

©2015 -


Information Technology


COUCHBASE ONLINE UPGRADE AND PATCHING
HOW TO UPGRADE OR PATCH COUCHBASE SERVER
In this demo, we will be patching the existing lab we had built previously. For details of the lab setup, see my article -
Just like in any other Big Data related database, Couchbase servers often have terabytes of data and the cluster is highly active.
Couchbase provides the means to upgrade your nodes in a rolling fashion known as Swap Upgrade. This method allows you to introduce a new node with the upgraded version. By design, Couchbase is supposedly backward compatible across all nodes and it is safe to have mixed versions within the cluster. But my rule of thumb, is to have a mixture of one version below to ensure full compatibility.
In situations where there are no extra node to do your swap, you may take one of the existing nodes offline to perform the upgrade or patching and have it rejoined later on in the cluster. But this approach requires that your cluster should be sized to take the production transaction load with acceptable performance when a node is down for maintenance. The following exercise is meant for this kind of situation.
TABLE OF CONTENTS
2. Remove A Node From Cluster For Upgrade
4. Perform Couchbase Upgrade or Patch
5. Check And Create Directory Path For Data And Index In The Upgraded Node
6. Start The Upgraded Couchbase To Join An Existing Cluster
8. Repeat the same steps for the rest of the nodes.
NOTE: If the cluster can take the load and has the storage capacity, you may perform upgrades 2 nodes or more at a time.
BASIC STEPS FOR ONLINE UPGRADE
See my article on various ways to backup Couchbase:
2. Remove A Node From Cluster For Upgrade
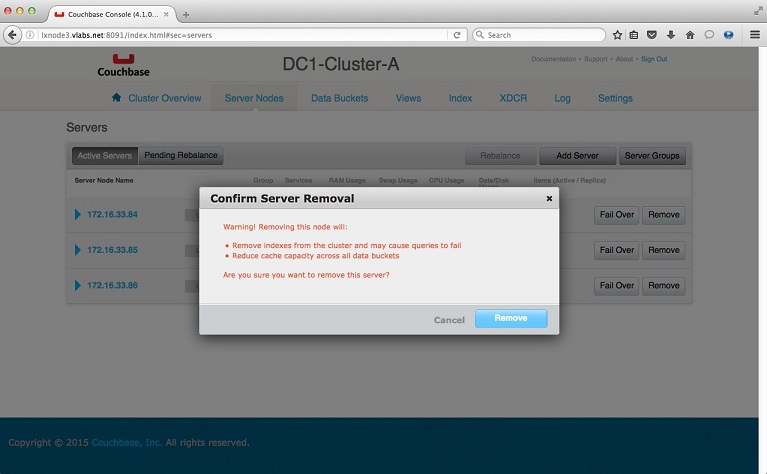
Go to Couchbase Web Console and select Server Nodes tab. Proceed to remove a node chosen for your upgrade or patch.
In this example, I selected node 1 -
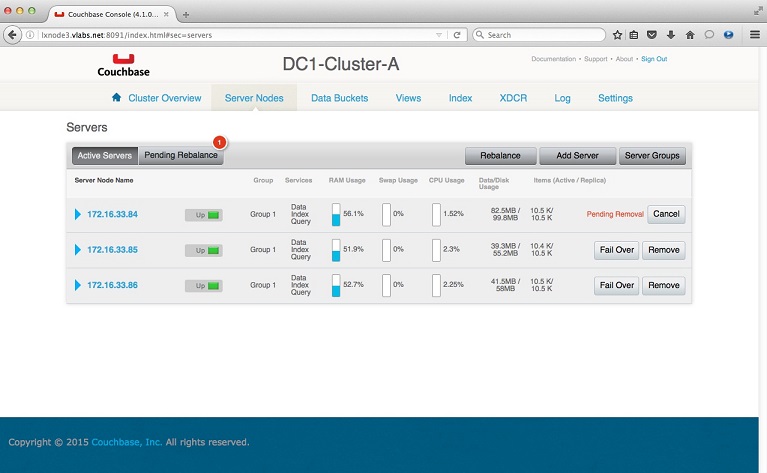
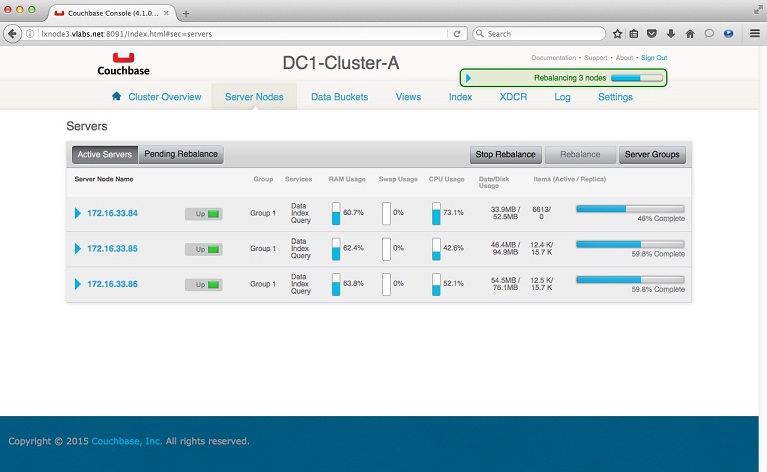
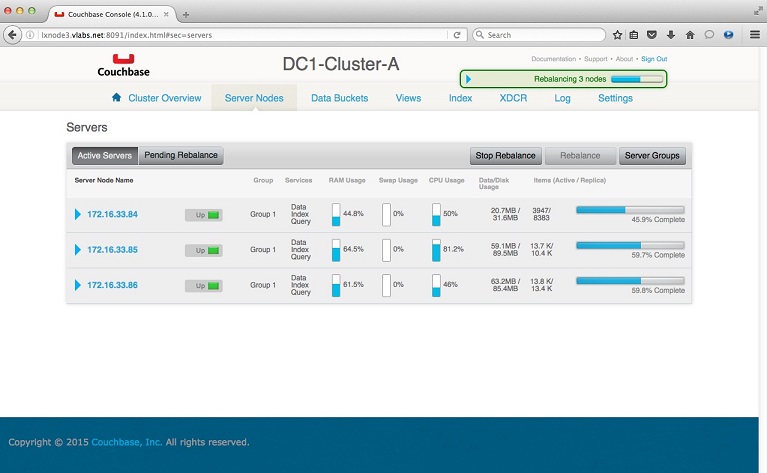
Previously, we had opted to remove 1 node from the cluster and its status is "Pending Removal" because a Rebalance has to occur for the surviving nodes. Proceed to click on the Rebalance button. Notice how the data is transfered from the removed node onto the surviving nodes by looking at the Data/Disk Usage stats.
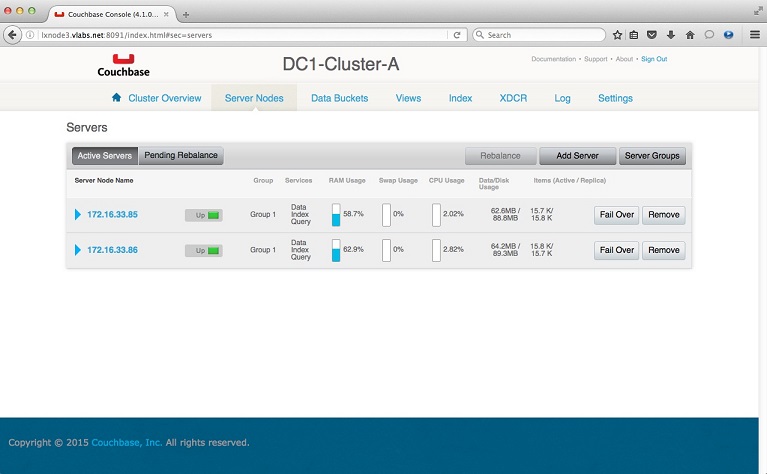
Once Rebalance has completed, you get the final list of active nodes for which at this point you are clear to perform upgrades and patches on the servers not listed here.
4. Perform Couchbase Upgrade or Patch
In my case I am performing a patch install from Couchbase 4.1.0 to 4.1.1.
I have copied the new rpm file onto the base directory of couchbase ( /app/couchbase/inst1 ).
4.1. Stop the running Couchbase instance in the removed node.
$CB_HOME/bin/couchbase-
4.2. Backup your previous version install.
[couchbas@lxnode1 inst1]$ cd /app/couchbase/inst1
[couchbas@lxnode1 inst1]$ ls
couchbase-
[couchbas@lxnode1 inst1]$
[couchbas@lxnode1 inst1]$ mv etc etc.4.1.0
[couchbas@lxnode1 inst1]$ mv opt opt.4.1.0
[couchbas@lxnode1 inst1]$
4.3. Install the new Couchbase version.
Install Couchbase Binary
[couchbas@lxnode1 inst1]$ pwd
/app/couchbase/inst1
[couchbas@lxnode1 inst1]$ rpm2cpio couchbase-
> -
409445 blocks
[couchbas@lxnode1 inst1]$
Install SSL libraries
[couchbas@lxnode1 inst1]$ cd /app/couchbase/inst1/opt/couchbase
[couchbas@lxnode1 couchbase]$ rpm2cpio /home/couchbas/Downloads/Couchbase/openssl098e-
> -
4577 blocks
[couchbas@lxnode1 couchbase]$ ls
bin doc etc lib LICENSE.txt man manifest.txt manifest.xml README.txt samples share usr var VERSION.txt
[couchbas@lxnode1 couchbase]$ ls usr/lib64
libcrypto.so.0.9.8e libcrypto.so.6 libssl.so.0.9.8e libssl.so.6 openssl098e
[couchbas@lxnode1 couchbase]$ mv usr/lib64/* lib/
[couchbas@lxnode1 couchbase]$
Set Couchbase Home Directory
[couchbas@lxnode1 couchbase]$ pwd
/app/couchbase/inst1/opt/couchbase
[couchbas@lxnode1 couchbase]$ ./bin/install/reloc.sh `pwd`
[couchbas@lxnode1 couchbase]$
5. Check and create directory path for data and index.
Check the Disk Storage path in the web console under the server node list by expanding the active node to reveal the details.
In my case, I had the data and index in the default install path:
<BASE_PATH>/opt/couchbase/var/lib/couchbase/data
<BASE_PATH>/opt/couchbase/var/lib/couchbase/index
Create the data and index directories.
[couchbas@lxnode1 inst1]$ ls -
total 8
drwxr-
-
-
drwxr-
[couchbas@lxnode1 inst1]$
[couchbas@lxnode1 inst1]$ mkdir -
[couchbas@lxnode1 inst1]$ mkdir -
[couchbas@lxnode1 inst1]$ ls -
total 16
drwxr-
drwxr-
drwxr-
-
-
drwxr-
[couchbas@lxnode1 inst1]$
6. Start the upgraded Couchbase to join an existing cluster.
6.1. Start the Couchbase instance in the upgraded node.
$CB_HOME/bin/couchbase-
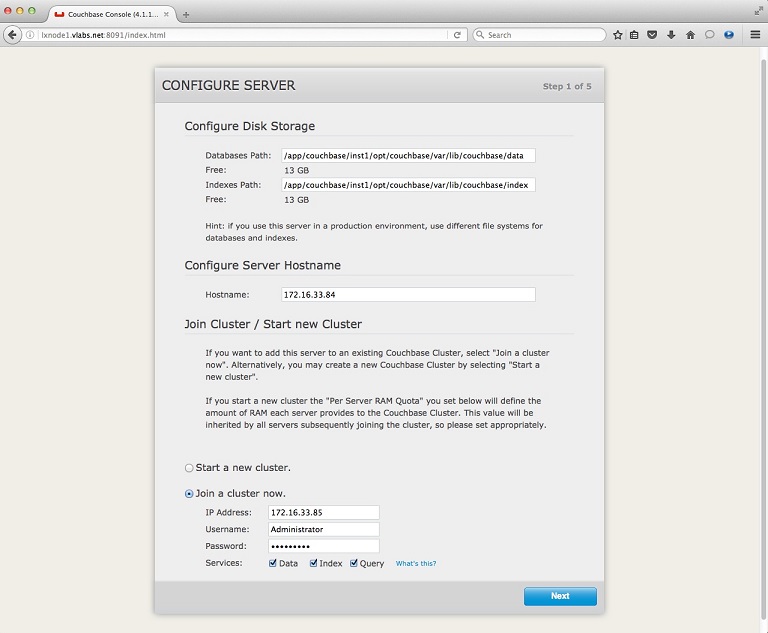
6.2. Configure Couchbase Instance to join the cluster.
Access the web console of the upgraded node and setup to join the cluster:
Supply the correct path for your data and index.
Supply the correct IP of the node hostname if you have multiple network interface configured.
Supply the IP of any active node in the cluster and the administrator user and password to join the cluster.

From your web console, select Server Nodes then click Rebalance button.
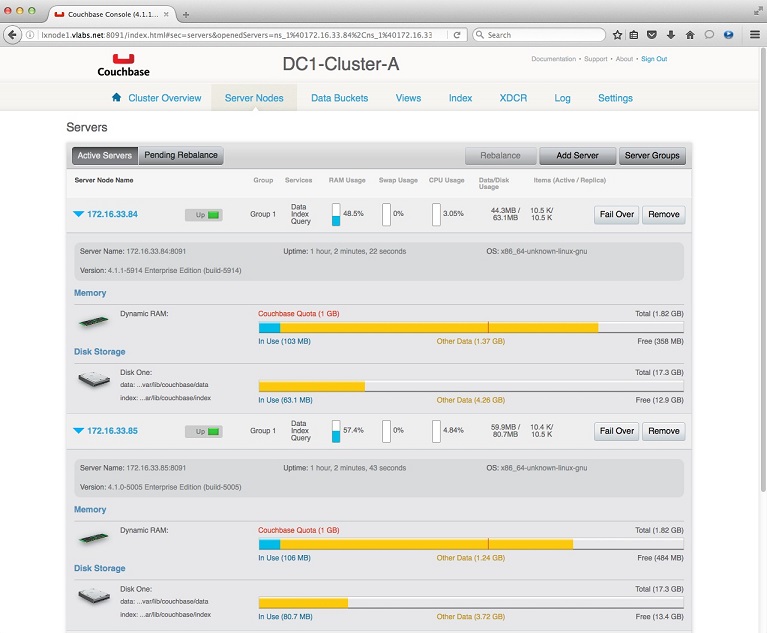
Once rebalance has completed, you may compare the versions between nodes by expanding the details of each server node.
On the example screen shot below, node 172.16.33.84 is of version 4.1.1 while node 172.16.33.85 is of version 4.1.0.
8. Repeat the same upgrade steps for the remaining nodes.