
©2015 -


Information Technology


HOW TO INSTALL AND CONFIGURE COUCHBASE SERVER -
The plan is to install Couchbase software in multiple instance mode so as to accommodate multiple applications requiring separate databases hosted by the same server. This option is also useful to accommodate various Couchbase versions on the same machine.
Create dir for the Couchbase instance:
[root@lxnode1 ~]# mkdir -
[root@lxnode1 ~]# chown -
Copy Installer to instance dir:
[couchbas@lxnode1 Couchbase]$ cp couchbase-
[couchbas@lxnode1 Couchbase]$
Install Couchbase RPM as CPIO onto local app dir:
cd /app/couchbase/inst1
rpm2cpio couchbase-
-
Example:
[couchbas@lxnode1 inst1]$ ls
couchbase-
[couchbas@lxnode1 inst1]$ rpm2cpio couchbase-
> -
409330 blocks
[couchbas@lxnode1 inst1]$
[couchbas@lxnode1 inst1]$ ls -
total 84208
-
drwxr-
drwxr-
[couchbas@lxnode1 inst1]$
Separately provide OpenSSL specific to the instance.
This would help isolate specific OpenSSL version per instance, per cluster avoiding repercussion of an upgraded or patched OpenSSL at the system level.
Download OpenSSL rpm package onto a temp directory.
Then, go to the directory where you extracted the couchbase server.
cd /app/couchbase/inst1/opt/couchbase
Open SSL install syntax:
rpm2cpio openssl098e-
Example:
[couchbas@lxnode1 couchbase]$ pwd
/app/couchbase/inst1/opt/couchbase
[couchbas@lxnode1 couchbase]$ ls
bin doc etc lib LICENSE.txt man manifest.txt manifest.xml README.txt samples share var VERSION.txt
[couchbas@lxnode1 couchbase]$
[couchbas@lxnode1 couchbase]$ rpm2cpio /home/couchbas/Downloads/Couchbase/openssl098e-
> -
4577 blocks
[couchbas@lxnode1 couchbase]$
[couchbas@lxnode1 couchbase]$ ls
bin doc etc lib LICENSE.txt man manifest.txt manifest.xml README.txt samples share usr var VERSION.txt
[couchbas@lxnode1 couchbase]$
The above extract has introduced a new usr directory.
Next is we move the extracted OpenSSL libraries to opt/couchbase/lib
couchbas@lxnode1 couchbase]$ ls usr/lib64
libcrypto.so.0.9.8e libcrypto.so.6 libssl.so.0.9.8e libssl.so.6 openssl098e
[couchbas@lxnode1 couchbase]$ mv usr/lib64/* lib/
[couchbas@lxnode1 couchbase]$
After the Couchbase installation extract has completed, run the script that sets the new Couchbase directory.
cd opt/couchbase
./bin/install/reloc.sh `pwd`
Note: With version 4.0 running the above command would give you a missing tar error such as:
[couchbas@lxnode1 couchbase]$ ./bin/install/reloc.sh `pwd`
tar: /app/couchbase/inst1/opt/couchbase/lib/python/pysqlite2.tar: Cannot open: No such file or directory
tar: Error is not recoverable: exiting now
[couchbas@lxnode1 couchbase]$
To fix tar error, put comment in the script referring to the code in order to complete successfully.
The pysqlite2 directory already exist with the extracted files during the initial install so no need to extract it again.
[couchbas@lxnode1 couchbase]$ vi ./bin/install/reloc.sh
extract_tars() {
py_ver=`python -
if test X"$py_ver" = X"4" ; then
tar xfm $dest/lib/python/pysqlite2_24.tar -
tar xfm $dest/lib/python/ctypes.tar -
chmod o+x $dest/lib/python/ctypes/
chmod -
else
# tar xfm $dest/lib/python/pysqlite2.tar -
echo Bypassed: tar xfm $dest/lib/python/pysqlite2.tar -
fi
chmod o+x $dest/lib/python/pysqlite2/
chmod -
}
Then Re-
The example below is of v4.1 which didn’t give out an error:
[couchbas@lxnode1 couchbase]$ cd /app/couchbase/inst1/opt/couchbase
[couchbas@lxnode1 couchbase]$ ./bin/install/reloc.sh `pwd`
[couchbas@lxnode1 couchbase]$
That's it! The installation is done! Now, do this same installation procedure for the rest of the nodes. Then up next, we’ll configure the Couchbase.
SETUP COUCHBASE USER ENVIRONMENT
The Couchbase home directory has a default path of opt/couchbase. Since we have a mount point for the instance, our home directory would then be:
/app/couchbase/inst1/opt/couchbase
Edit your bash profile .bash_profile to add:
# Couchbase Server
CB_HOME=/app/couchbase/inst1/opt/couchbase ; export CB_HOME
PATH=$CB_HOME/bin:$PATH:. ; export PATH
Moving forward, we’ll use the CB_HOME to reference lengthy paths.
Data Distribution
2-
Replication
Couchbase allows us to have copies of data sets. One can have up to 3 replicas that resides within a local cluster.
In the event of node failure, it can failover (manual or auto) to as many nodes of replicas.
For example:
Scenario 1. In a five node cluster with one replica, if one node goes down, you can fail it over. If a second node goes down, you no longer have enough replica copies to fail over to and will have to go through a slower process to recover.
Scenario 2. In a five node cluster with two replicas, if one node goes down, you can fail it over. If a second node goes down, you can fail it over as well. Should a third one go down, you now no longer have replicas to fail over.
After a node goes down and is failed over, try to replace that node as soon as possible and rebalance. The rebalance recreates the replica copies (if you still have enough nodes to do so).
As best practice, create one replica for every five nodes in your cluster.
Running multiple instance on the same host would mean that we cannot use the same default ports. One has to assign a unique port to each instance.
Also, the instance name has to have its own unique name other than the default ns_1 so that each instance will have a distinctive identification.
You add the user-
Here's the current setting of static_config after the install:
[couchbas@lxnode1 ~]$ cat $CB_HOME/etc/couchbase/static_config
{error_logger_mf_dir, "/app/couchbase/inst1/opt/couchbase/var/lib/couchbase/logs"}.
{path_config_bindir, "/app/couchbase/inst1/opt/couchbase/bin"}.
{path_config_etcdir, "/app/couchbase/inst1/opt/couchbase/etc/couchbase"}.
{path_config_libdir, "/app/couchbase/inst1/opt/couchbase/lib"}.
{path_config_datadir, "/app/couchbase/inst1/opt/couchbase/var/lib/couchbase"}.
{path_config_tmpdir, "/app/couchbase/inst1/opt/couchbase/var/lib/couchbase/tmp"}.
{path_config_secdir, "/app/couchbase/inst1/opt/couchbase/etc/security"}.
{nodefile, "/app/couchbase/inst1/opt/couchbase/var/lib/couchbase/couchbase-
{loglevel_default, debug}.
{loglevel_couchdb, info}.
{loglevel_ns_server, debug}.
{loglevel_error_logger, debug}.
{loglevel_user, debug}.
{loglevel_menelaus, debug}.
{loglevel_ns_doctor, debug}.
{loglevel_stats, debug}.
{loglevel_rebalance, debug}.
{loglevel_cluster, debug}.
{loglevel_views, debug}.
{loglevel_mapreduce_errors, debug}.
{loglevel_xdcr, debug}.
{loglevel_xdcr_trace, error}.
{loglevel_access, info}.
{disk_sink_opts,
[{rotation, [{compress, true},
{size, 41943040},
{num_files, 10},
{buffer_size_max, 52428800}]}]}.
{disk_sink_opts_xdcr_trace,
[{rotation, [{compress, false},
{size, 83886080},
{num_files, 5}]}]}.
{net_kernel_verbosity, 10}.
[couchbas@lxnode1 ~]$
Since the original static_config file has no ports and instance name defined, Couchbase server will use the default values.
|
PARAMETER |
FUNCTION |
DEFAULT |
DESCRIPTION |
|
rest_port |
Web administration port |
8091 |
Used by the Couchbase Web Console for REST/HTTP traffic. |
|
mccouch_port |
Default value for mccouch |
11213 |
Internal ports used on the local host for memcached and compaction. |
|
memcached_port |
Client interface (proxy) |
11211 |
Used by pre- |
|
memcached_dedicated_port |
Client interface (proxy) |
11211 |
Used by pre- |
|
moxi_port |
Internal/external bucket port |
11210 |
Used by smart client libraries or Moxi to directly connect to the data nodes. |
|
ssl_rest_port |
Internal REST HTTPS for SSL |
18091 |
Used by the Couchbase Web Console for REST/HTTP traffic with SSL. |
|
ssl_capi_port |
Internal CAPI HTTPS for SSL |
18092 |
Used to access views, run queries, and update design documents with SSL. |
|
ssl_proxy_downstream_port |
Incoming SSL proxy |
11214 |
Used for SSL XDCR data encryption. |
|
ssl_proxy_upstream_port |
Internal outgoing SSL proxy |
11215 |
Used for SSL XDCR data encryption. |
|
short_name |
Instance identifier |
ns_1 |
Instance short name. |
For a complete listing of ports to include non-
Couchbase 4 Network Configuration
Changing Default Ports
To assign new ports for the instance, add the corresponding parameter into the static_config file along with its value using the following format:
{parameter, value}.
For example,
{rest_port, 8191}.
{mccouch_port, 11013}.
{memcached_port, 11011}.
{memcached_dedicated_port, 11099}.
{moxi_port, 11010}.
{ssl_rest_port,18191}.
{ssl_capi_port,18192}.
{ssl_proxy_downstream_port,11014}.
{ssl_proxy_upstream_port,11015}.
Coucbase API port is used to access views, run queries, and update design documents.
CAPI port (default 8092) can be edited in the /opt/couchbase/etc/couchdb/default.d/capi.ini file by replacing 8092 with the new port value (i.e. 8192).
To run multiple Couchbase server instances on the same host, we need to change the default ns_1 name.
In my case I will use the naming convention cb4inst1 to identify as Couchbase v4 Instance 1. This way I can identify the various Couchbase version and their instances.
The change is applied on two configuration files:
Edit $CB_HOME/etc/couchbase/static_config and add the following to set the new instance name:
{short_name, "cb4inst1_n1"}.
Edit $CB_HOME/bin/couchbase-
sed -
The above command replaces the two occurrences of babysitter_of_ns_1 to babysitter_of_cb4inst1_n1.
example:
[couchbas@lxnode1 couchbase]$ cat $CB_HOME/bin/couchbase-
-
-
[couchbas@lxnode1 couchbase]$
[couchbas@lxnode1 couchbase]$ cd $CB_HOME
[couchbas@lxnode1 couchbase]$ pwd
/app/couchbase/inst1/opt/couchbase
[couchbas@lxnode1 couchbase]$ cp $CB_HOME/bin/couchbase-
[couchbas@lxnode1 couchbase]$ sed -
[couchbas@lxnode1 couchbase]$ cat bin/couchbase-
-
-
[couchbas@lxnode1 couchbase]$
Limitations of Multi-
-
-
-
-
NOTE: Since for this exercise we wanted to test the Cbrecovery for data recovery from remote clusters (XCDR), we will forgo customizing of ports and would just change the instance name and assign that instance to a specific VIP host to further isolate it from the main server host to avoid conflicts of opened ports.
LINUX HOST FIREWALL CONFIGURATION
1. Go to the Linux firewall configuration manager: System > Administration > Firewall
2. Select "Other Ports" in the Left Menu Pane and start adding the following range of ports as User Defined assuming that you are using the default ports.
4369
8091-
9100-
9500
9998-
11207
11209-
18091-
21100-
All the above ports are of TCP protocol.
Do all the above host firewall change on each node of your planned Couchbase cluster.
NETWORK FIREWALL CONFIGURATION
If the Couchbase database cluster is protected by a network firewall, the following default ports need to be opened in order for the applications, clients and remote XDCR clusters be able to communicate.
8091-
9998
11207
11209-
18091-
To run the server, use ./bin/couchbase-
To stop the server, use ./bin/couchbase-
You can optionally build a script for the start and stop commands at the user's home directory.
>>>File: start_cb.sh
CB_HOME=/app/couchbase/inst1/opt/couchbase ; export CB_HOME
$CB_HOME/bin/couchbase-
>>>File: stop_cb.sh
CB_HOME=/app/couchbase/inst1/opt/couchbase ; export CB_HOME
$CB_HOME/bin/couchbase-

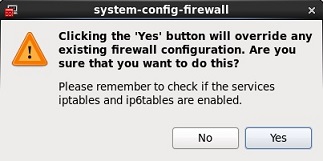
3. When done adding your list, click the Apply button in the top bar and select Yes to overwrite existing entries.