
©2015 -


Information Technology


HOW TO INSTALL AND CONFIGURE COUCHBASE SERVER -
BUILDING A SECOND CLUSTER FOR REPLICATION
What we have built so far is the DC1-
We plan to create another cluster which we would make it our failover site using Couchbase Replication XDCR.
For this second cluster, we'll assign the nodes lxnode5, lxnode6, lxnode7 as the members.
To build,
1. Install the Couchbase binaries. Follow the same instructions as discussed in the section Multiple Instance Install (non-
2. Configure Couchbase for Multi-
Assign the following instance name for each of the node you setup.
cb4inst1_n1 is for lxnode5
cb4inst1_n2 is for lxnode6
cb4inst1_n3 is for lxnode7
We will not be changing the ports but just the instance name.
3. Setup Firewall to open critical ports for Couchbase.
4. Setup Couchbase as new cluster.
Follow the instructions as discussed in the section -
Make sure that the VIP (lxnode?cb-
Name the cluster as DC2-
5. Add nodes to the cluster.
As for the remaining nodes -
For Cross Data Center Replication (XDCR) you need an existing cluster in your failover site.
If you haven't have a cluster for your replicated data, you need to read the details of building one as discussed in the section -
Once you got a working cluster in your failover site, proceed to next step on building buckets in your failover cluster.
For the sake of this exercise, I had built a failover cluster called DC2-
CREATE A BUCKET AS A RECIPIENT OF REPLICATED DATA
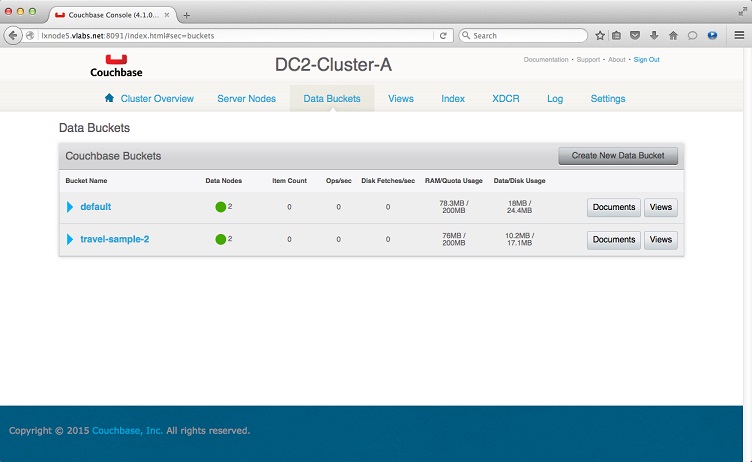
At the failover cluster DC2-
Although we could name the new bucket the same as the source, for distinction purposes, I would name it slightly different enough to distinguish a failover bucket.
Since during the install we had pre-
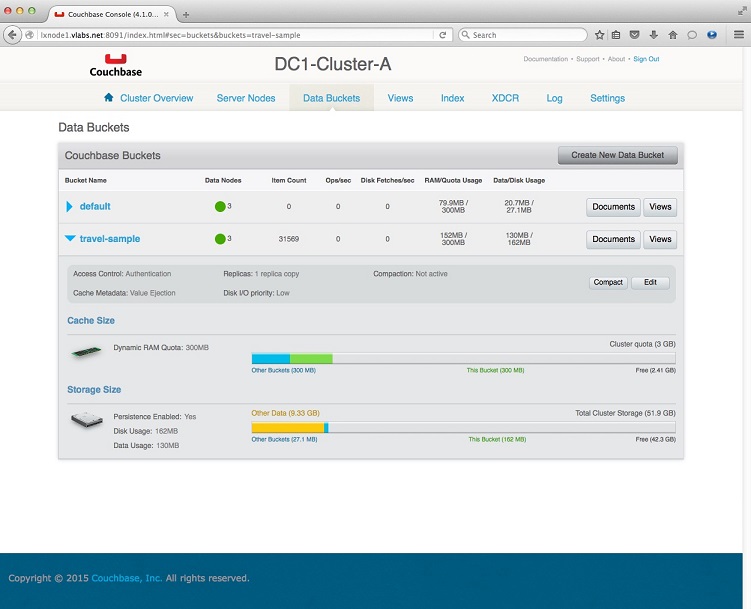
1. Access the Web Console of the primary site DC1-
2. Select Data Buckets tab and click the triangle to expand the travel-
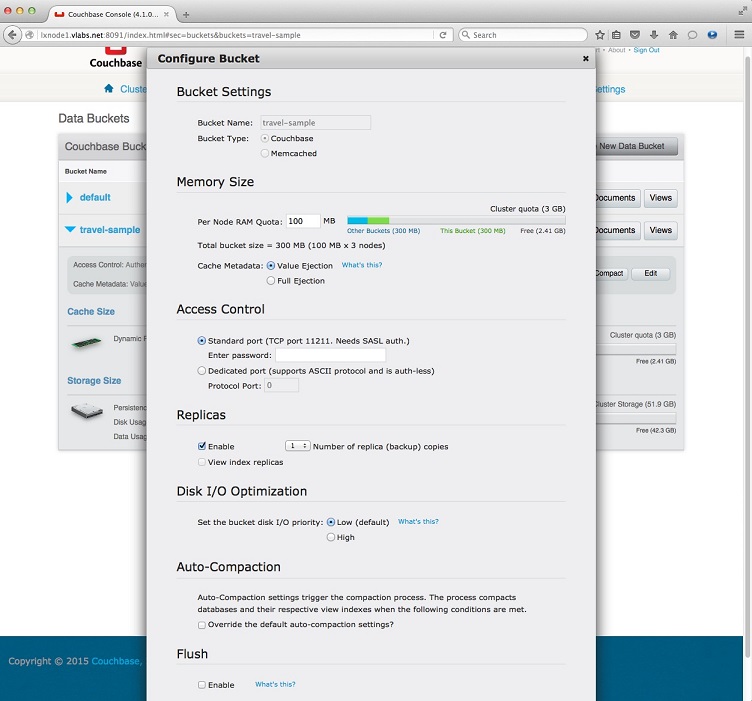
3. Click Edit button to view the details and take note of its properties as we will use this to create a new bucket in the failover site cluster DC2-
The basic information you would need at this point is -
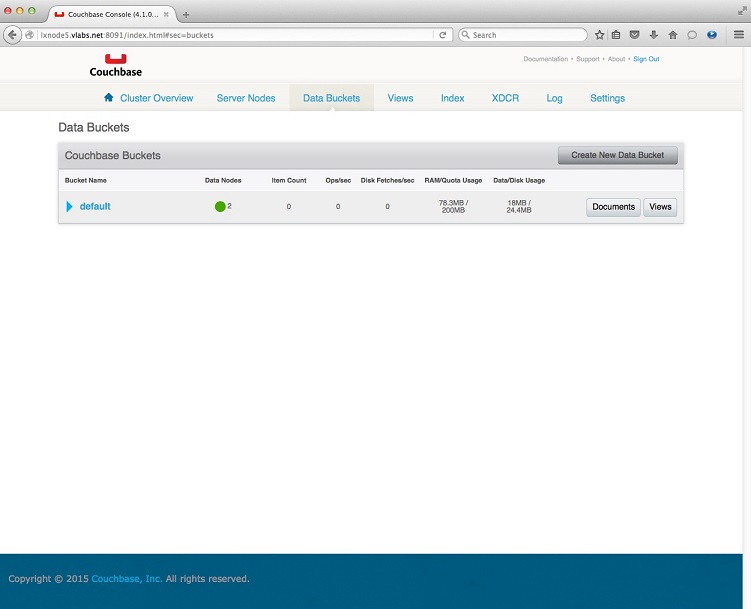
4. Access the Web Console of DC2-
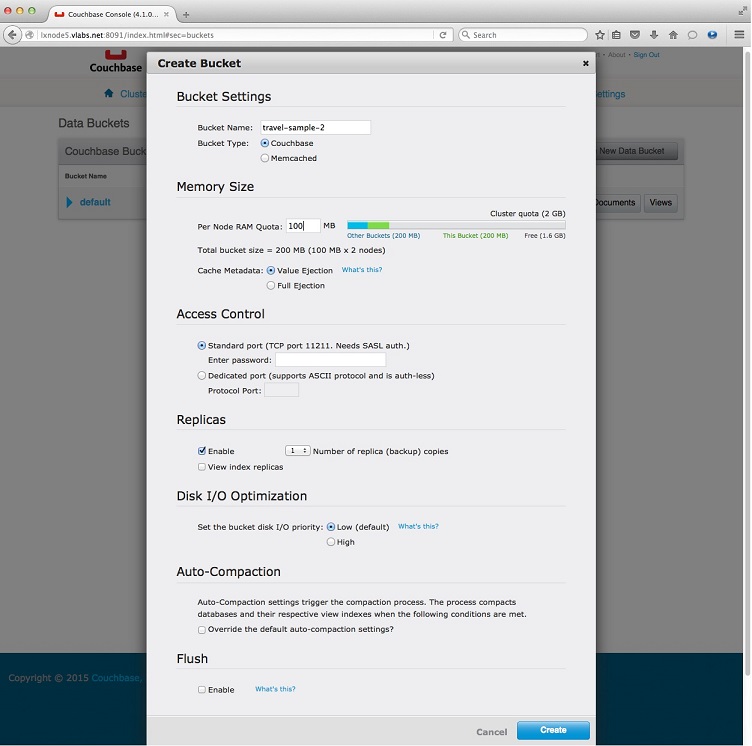
5. Select Data Buckets tab and click the Create New Data Bucket button.
6. Provide the bucket info and save.
Bucket Settings,
Bucket Name: travel-
Bucket Type: Couchbase
Memory Size,
RAM Quota: 100 MB
Cache Metadata: Value Ejection
Access Control,
Standard Port 11211
Replicas,
Enable, 1 replica
Disk I/O Optimization, low (default)
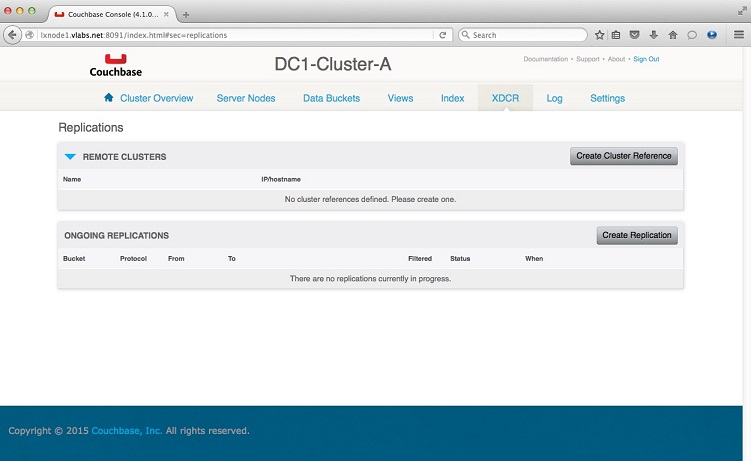
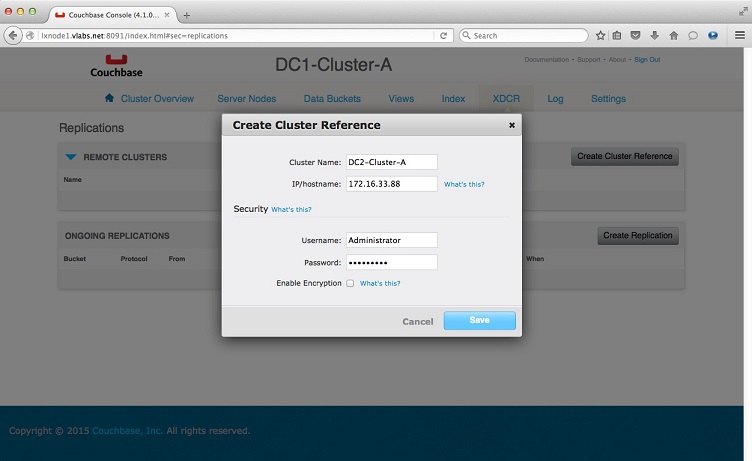
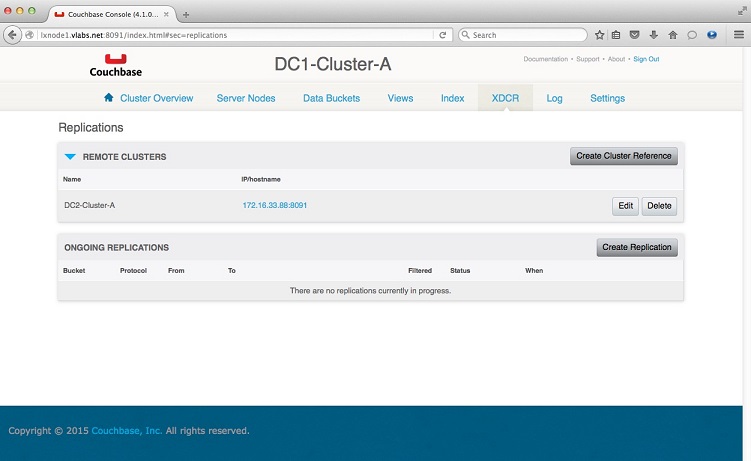
2. Click Create Cluster Reference.
Cluster Name: DC2-
IP/hostname: 172.16.33.88 (lxnode5cb-
Admin Username: Administrator
Password:
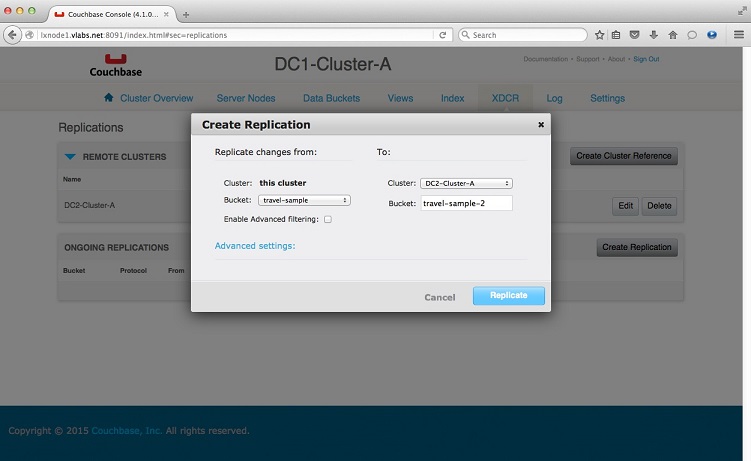
3. Click Create Replication
Replicate Changes from:
Cluster: this cluster
Bucket: travel-
To:
Cluster: DC2-
Bucket: travel-
Advance Settings (Optional)
Parameters and their default values.
XDCR Protocol = Version 2 , Use Version 2 (XMEM) for all implementation except Elasticsearch integration.
XDCR Source Nozzles per node = 2 , value 1 to 100; Must be less than or equal to the number of XDCR Target Nozzles per Node.
XDCR Target Nozzles per node = 2 , value 1 to 100; This can be set higher if the target nodes have high processing power.
Number of concurrent workers writing to the target cluster = XDCR Target Nozzles per Node * <Number of Nodes in Target Cluster>
XDCR Checkpoint Interval = 1800 , value 60 to 14,400 seconds; Interval between checkpoints
XDCR Batch Count = 500 , value 500 to 1,000 doc batching count; increase 2-
XDCR Batch Size (kb) = 2048 , value 10 to 100,000 kb doc batching size; increase 2-
XDCR Failure Retry Interval = 10 , value 1 to 300 seconds; Lower when expecting network failures
XDCR Optimistic Replication Threshold = 256 , value 0 to 2,097,152 bytes (20mb) compressed; Optimistic lower the size
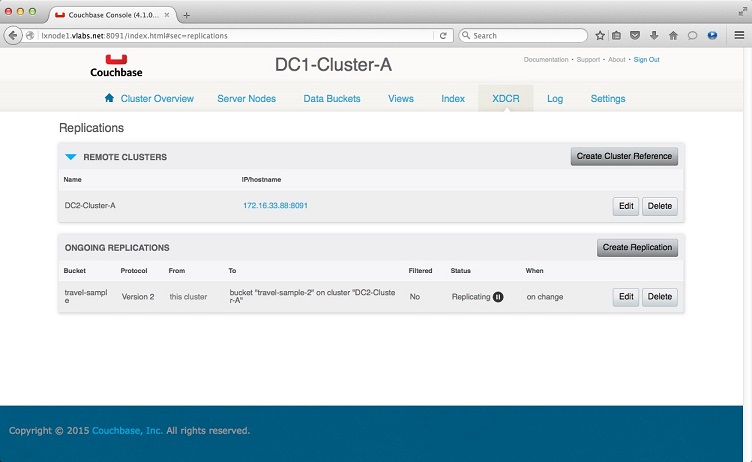
That's it, the bucket travel-
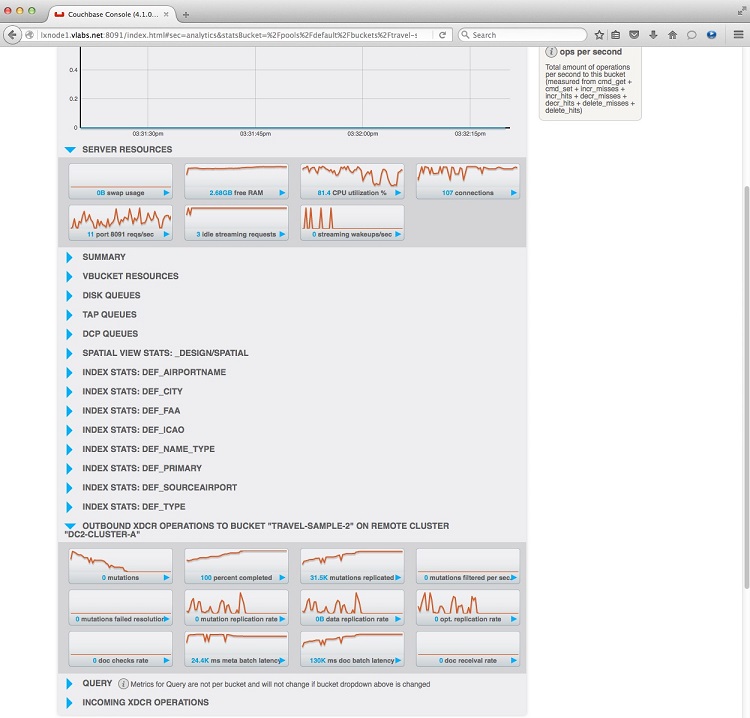
You may further look at the replication stats when you click on the travel-
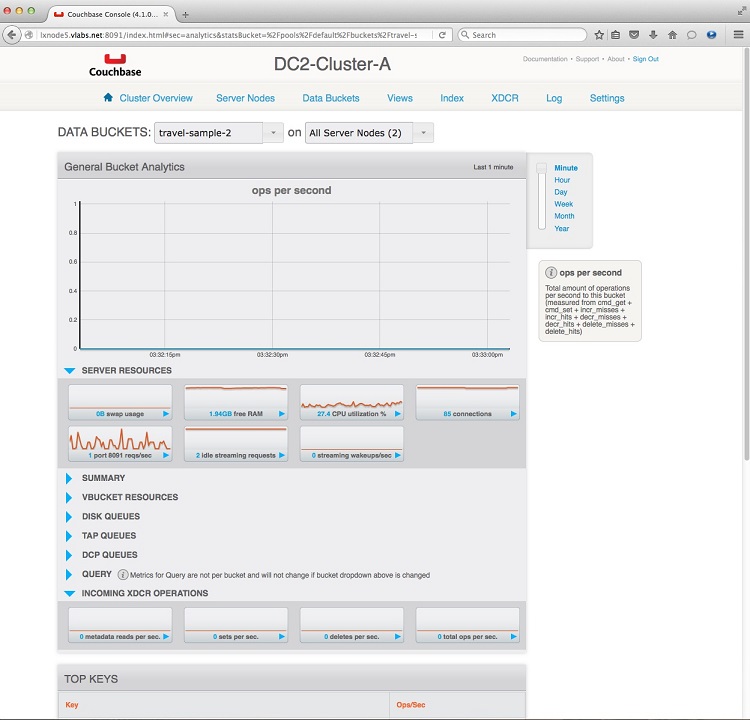
And similarly, you may check the Inbound XDCR Operations at the failover cluster DC2-
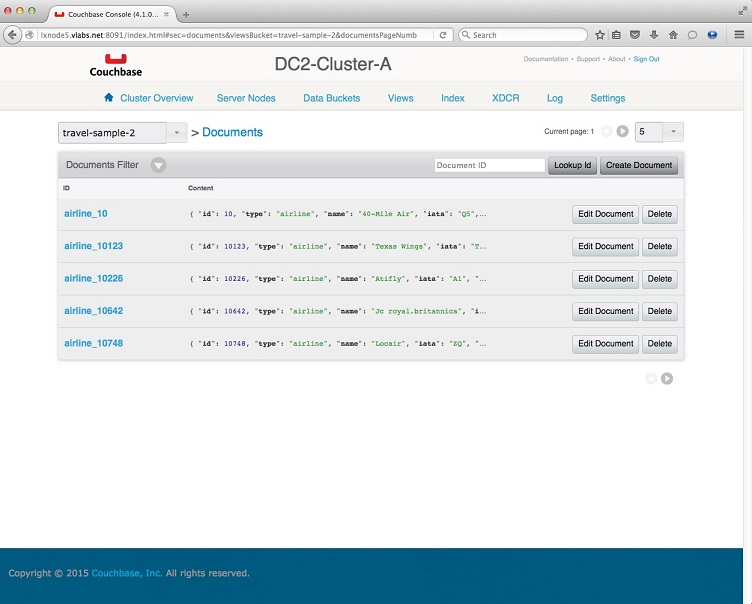
To verify that the data went into our empty travel-
