
©2015 -


Information Technology

VIRTUAL BOX GUEST OS INSTALLATION -

4. Install the Guest Operating System in the Virtual Machine
Pre-
You need to set the initial VM configuration covers the following adjustments:
-
-
-
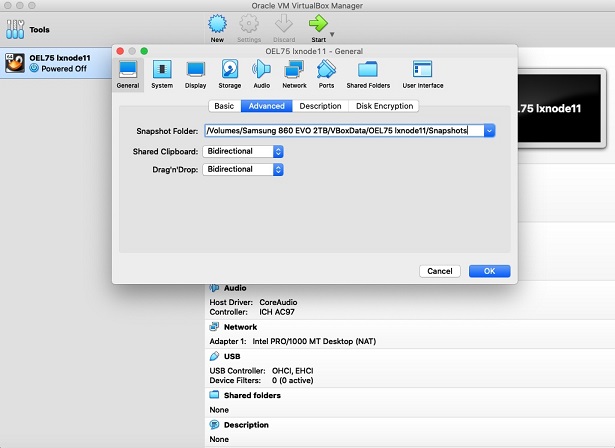
From the Virtual Box Manager Window, select the newly created VM (OEL75 lxnode11) then click Settings in the top bar.
Then, from the General configuration window, select the Advanced tab to modify the Shared Clipboard and Drag n Drop to set Bidirectional.
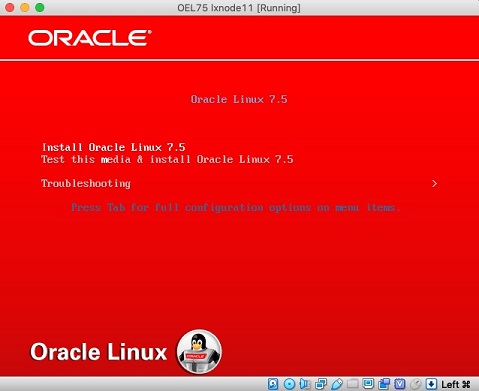
The following screen prompts will be specific to the Operating System installation. In this case, Oracle Linux installation.
Select "Install Oracle Linux 7.5".
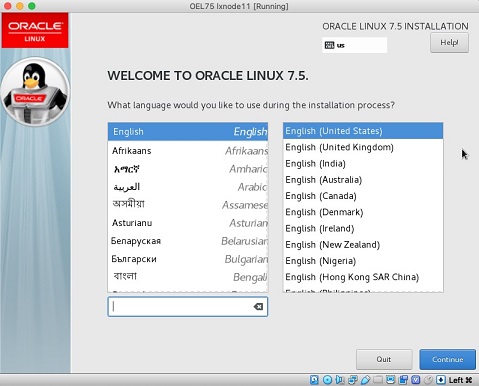
Select the language you prefer.
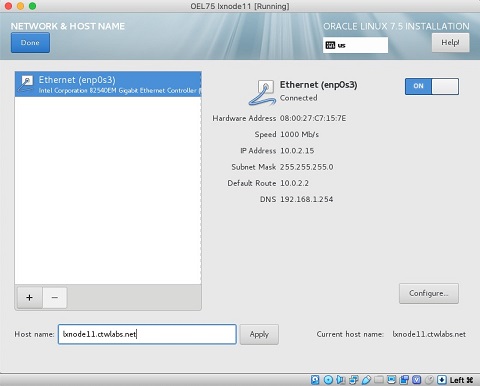
Set the Network to “ON” so that the ethernet shows “Connected”. Then, set your hostname and click apply.
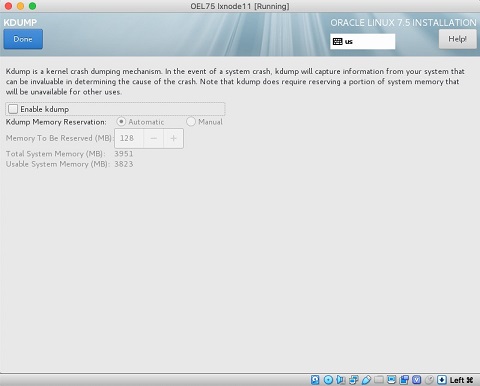
You may uncheck the Kdump to avoid kernel dumps during a panic if your purpose of your VM is just for study.
This will save you disk space.
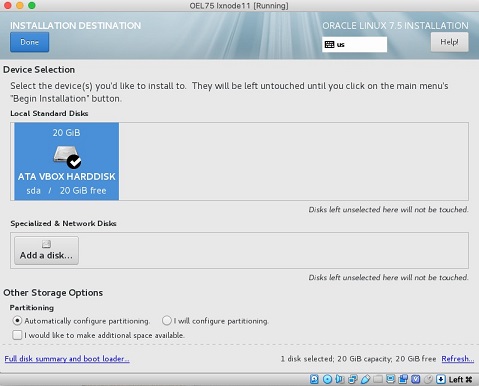
Select your installation destination disk. Make sure that it shows Check symbol.
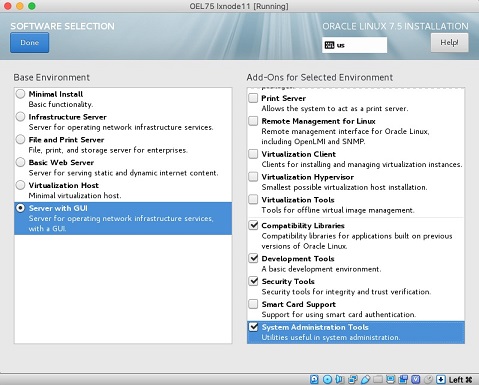
From the Software Selection, check the option -
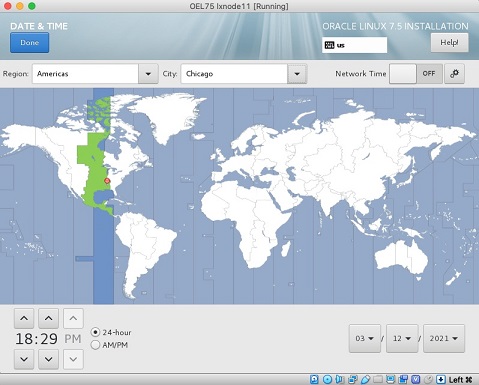
Set your Date and Time. Make sure that you set the NTP as well.
At this point, you now have a Oracle Linux VM.
However, it is a stand alone system that you cannot access the VM from the local host (i.e. SSH, HTTP).
We then need to configure a virtual host network for this VM so it can be accessible outside its instance.
This is discussed on the next section.
HOW TO SET CUSTOM DISPLAY RESOLUTION IN VIRTUAL BOX
For VirtualBox 5.1 only:
All Guest OS will have a standard VGA mode resolution in 4:3 (800x600, 1024x768, 1152x864, etc.) available for the the Guest OS to select. However, there’s no option for widescreen resolution. To have that option available to Linux Guest OS, run the following command in your Mac OS Terminal:
VBoxManage setextradata "Your Guest OS Name” CustomVideoMode1 1440x900x32
To be safe, the above command must be run with the Guest OS shutdown. Once done, startup your Guest OS and proceed to change your screen resolution. The options will now have your custom settings for you to select.
HOW TO MAKE AUTO RESIZE GUEST DISPLAY TO WORK IN VIRTUAL BOX
For Windows Guest installations, the Auto Resize Guest Display and View Screen preset selection doesn’t usually work. The theory behind this malfunction -
Now that the initial VM configuration has been set, we can now proceed with the installation of the Linux OS.
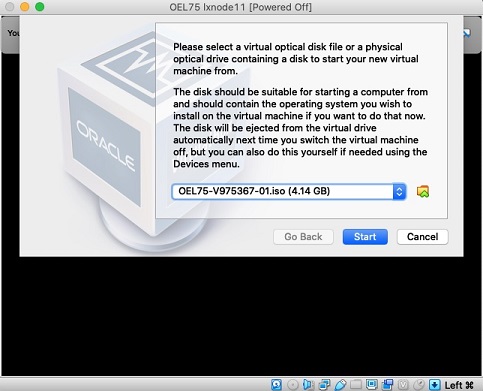
Select Start icon from the top bar menu of the Virtual Box.
You will then be presented with a drop selection for your operating System ISO file.
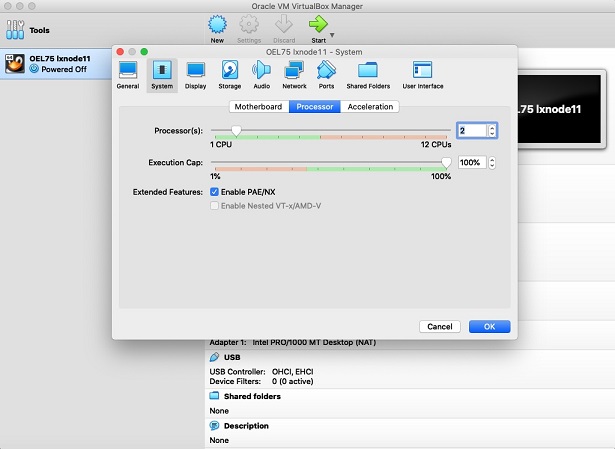
From the System configuration window, set the vCPUs according to your requirements.
Note that for performance reasons you should not exceed to half the total number of CPUs available.
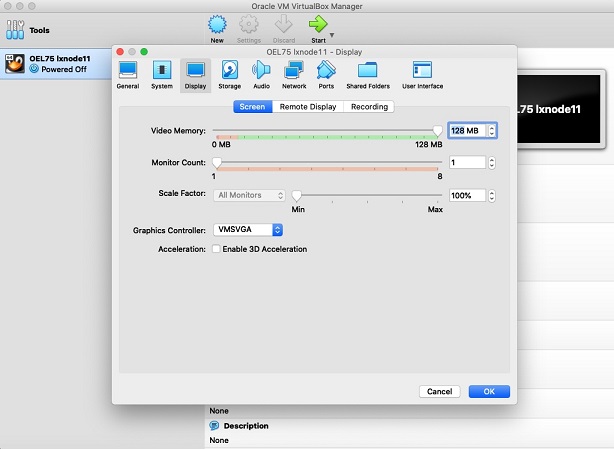
From the Display configuration window, set the screen Graphics controller to VMSVGA and optionally, adjust the video memory for better color buffering and to accommodate higher screen size for the Guest Host.
Finally, click [OK] button to save all the configuration changes.
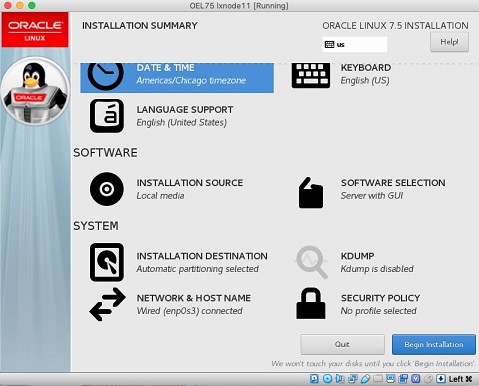
Next, you will be presented with the installation configuration window.
From here, you will setup the following:
-
-
-
-
-
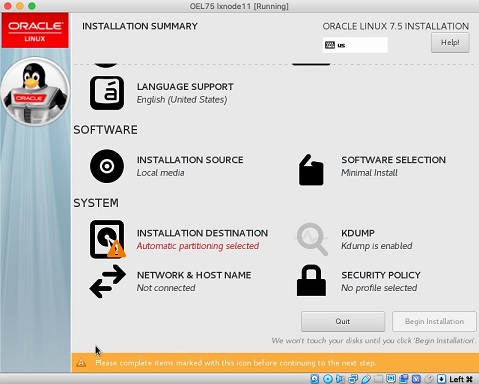
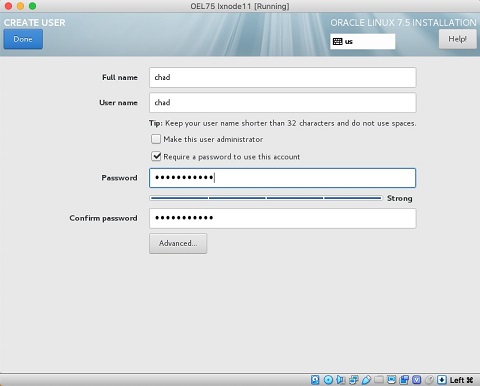
Once you applied all configurations, click Begin Installation.
While the installation is on-
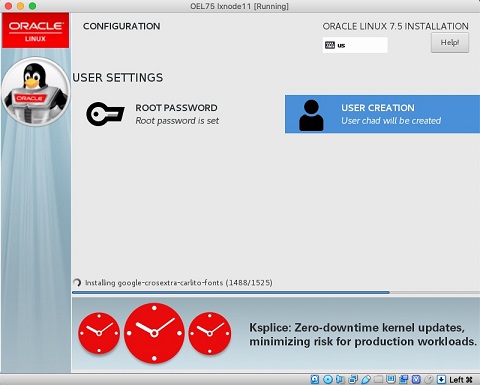
The entire installation process takes about 15 minutes, depending on the speed of your SSD.
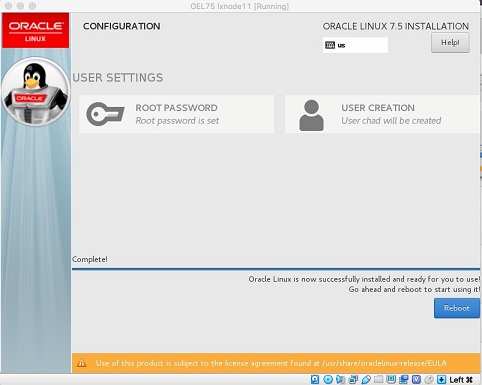
You should see a success window once completed.
Proceed to reboot when done.