

©2015 -


Information Technology

VIRTUAL BOX GUEST OS INSTALLATION -

5. Configure Local Host Network
By default, a newly created Guest OS only has a NAT interface and nothing outside the Guest Host can connect to it.
You can define a network segment for DHCP for a group of VMs to allow these VMs to communicate each other and to allow terminal access. This can be done by adding a Host-
A Host-
In this example, I'll be creating a single network segment and add a network interface attached to this segment onto the newly created VM (Linux Node 1).
5.1. Create A Host Network
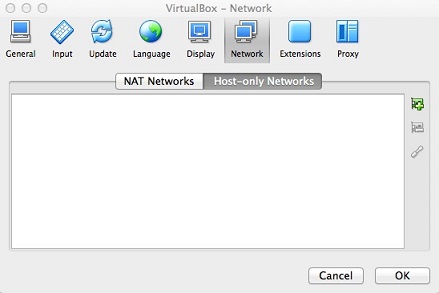
Go to the Virtual Box Preferences, then select Network.
Select "Host-
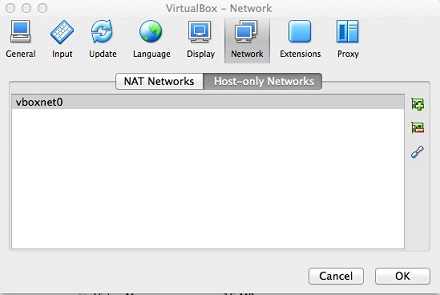
This will create vboxnet0 network with DHCP.
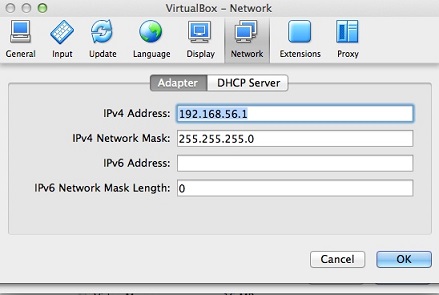
You may examine the assigned network IP range by either hovering your mouse onto the network name or by invoking the edit.
Notice that the network segment is in the 192.168.56.1 network and the DHCP server (192.168.56.100) is enabled which would assign dynamic IP from 192.168.56.101 up to 192.168.56.254.

5.2. Add A Network Interface Onto A VM
The next step is to add a network interface to the VM (Linux Node 1) attached to the network segment vboxnet0.
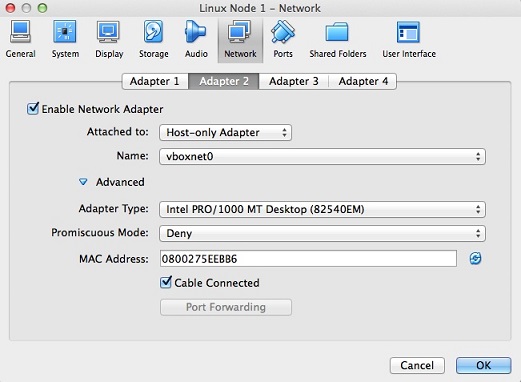
Go to the VirtualBox Manager Window and select your target VM and click Settings icon, then select the Network tab.
You'll notice that Adapter 1 is already configured attached to a NAT which was done during the VM setup earlier.
This NAT gives your VM the ability to access internet.
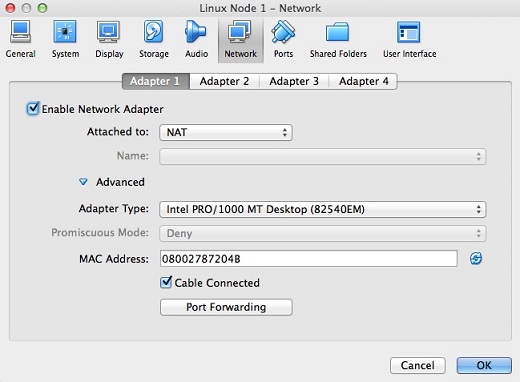
We need to configure another network adapter for our host network (vboxnet0).
Click on Adapter 2 tab and enable the adapter and then attach it to Host-
Click OK button when done to save your changes.
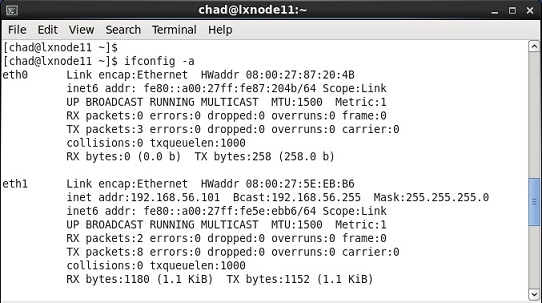
At this point, the VM now has an additional network interface. By default in Linux, this interface is configured with DHCP and will have an IP based on the range you defined in your Host-
HOW TO CONFIGURE (PERMANENT) STATIC IP FOR VIRTUAL BOX LINUX GUEST OS
Assigning a static IP for your Guest OS allows you to have a permanent IP for your application to connect to. This is particularly necessary for database and web server hosts.
By default, once you got a local host configured for your Guest OS, it is assigned a dynamic IP via DHCP which varies depending on the order of which you start the Virtual Box VMs.
To have a more consistent host IP, you need to reconfigure the network interface properties in your Guest OS.
The following is an example of a static IP network configuration for Linux.
PREREQUISITE: You must have already configured a local host network in Virtual Box and assign it to the Guest OS. See -
Network Configuration Using Desktop GUI
1. From the Red Hat 6 Menu, go to: System -
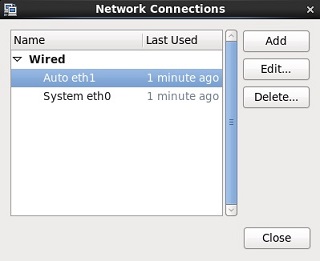
2. Set the static IP properties.
NOTE: By default, this interface is configured with DHCP. Since we plan to assign a permanent IP, we have to use a Manual method of configuration. What this means -
[x] Connect Automatically
[x] Available To All Users
IPv4 Settings:
Method: Manual
Addresses [Add]
Address: 192.168.56.11
Netmask: 255.255.255.0
Gateway: 0.0.0.0
DNS Servers: leave it blank if you don't have any DNS service running on this network segment.
Search Domains: leave it blank if you don't have any public or internal domain name.

3. Update your hosts file (/etc/hosts) in both the Host OS and Guest OS to specify your permanent host IP if you don't have a DNS to resolve the IP.
Example:
##
# Host Database
#
# localhost is used to configure the loopback interface
# when the system is booting. Do not change this entry.
##
127.0.0.1 localhost
255.255.255.255 broadcasthost
::1 localhost
#
##-
192.168.56.11 lxnode11.vlabs.net lxnode11
192.168.56.12 lxnode12.vlabs.net lxnode12
192.168.56.13 lxnode13.vlabs.net lxnode13
192.168.56.14 lxnode14.vlabs.net lxnode14